subscribe via rss e-mail me facebook pinterest home Image Map
Showing posts with label bags. Show all posts

May 10, 2012

Olive Swing Bag

When I saw the Olive Swing Bag pattern at the Quilt Market last Fall, I knew immediately I wanted to make it for my sister. I waited for her birthday, which was last month. I even had her come over and pick out the fabrics she wanted, not knowing what they would be used for.
The pattern was so easy, and only took about 20 minutes. I was even being dumb and only half reading the instructions, because I only cut out half the pieces needed. One outside and one inside. I sewed the wrong pieces together and had to unpick. It still only took about 20 minutes. The bag is reversible. However, I opted for a different closure than the pattern calls for, so it is not reversible. I used a magnetic snap, which I found on clearance!


As a bonus, there is an additional pattern included to make a soft case for sunglasses, using the leftovers from the bag. The bag seemed a little empty still, so I made a little booklet cover I had seen on her Pinterest page. Both of things were quick and simple, and were used from the leftovers of the bag.


The fabrics used are Sugar Floral in Pink from the Sugar & Spice collection by The Quilted Fish
And Haybale in Yellow from the Farm Fresh collection by October Afternoon.
The Olive Swing Bag & Sunglass pattern can be found here.
The booklet pattern can be found here.


September 27, 2011

Trick-or-Treat Bags {a tutorial}

I thought I would share with y'all how I made the Trick-or-Treat bags for my kids. I followed some basic instructions, with a few minor changes. Now, this is my first tutorial, so please bear with me if it is not very good. I apologize for the pictures ahead of time, since I didn't have help with this. I had to hold the pieces up and take a picture at the same time. Not always an easy task.


What you'll need:
     
1 top fabric
1 bottom fabric
1 liner fabric
1 handle fabric
(If using fat quarters, you will need 2 for the lining)


Cutting:

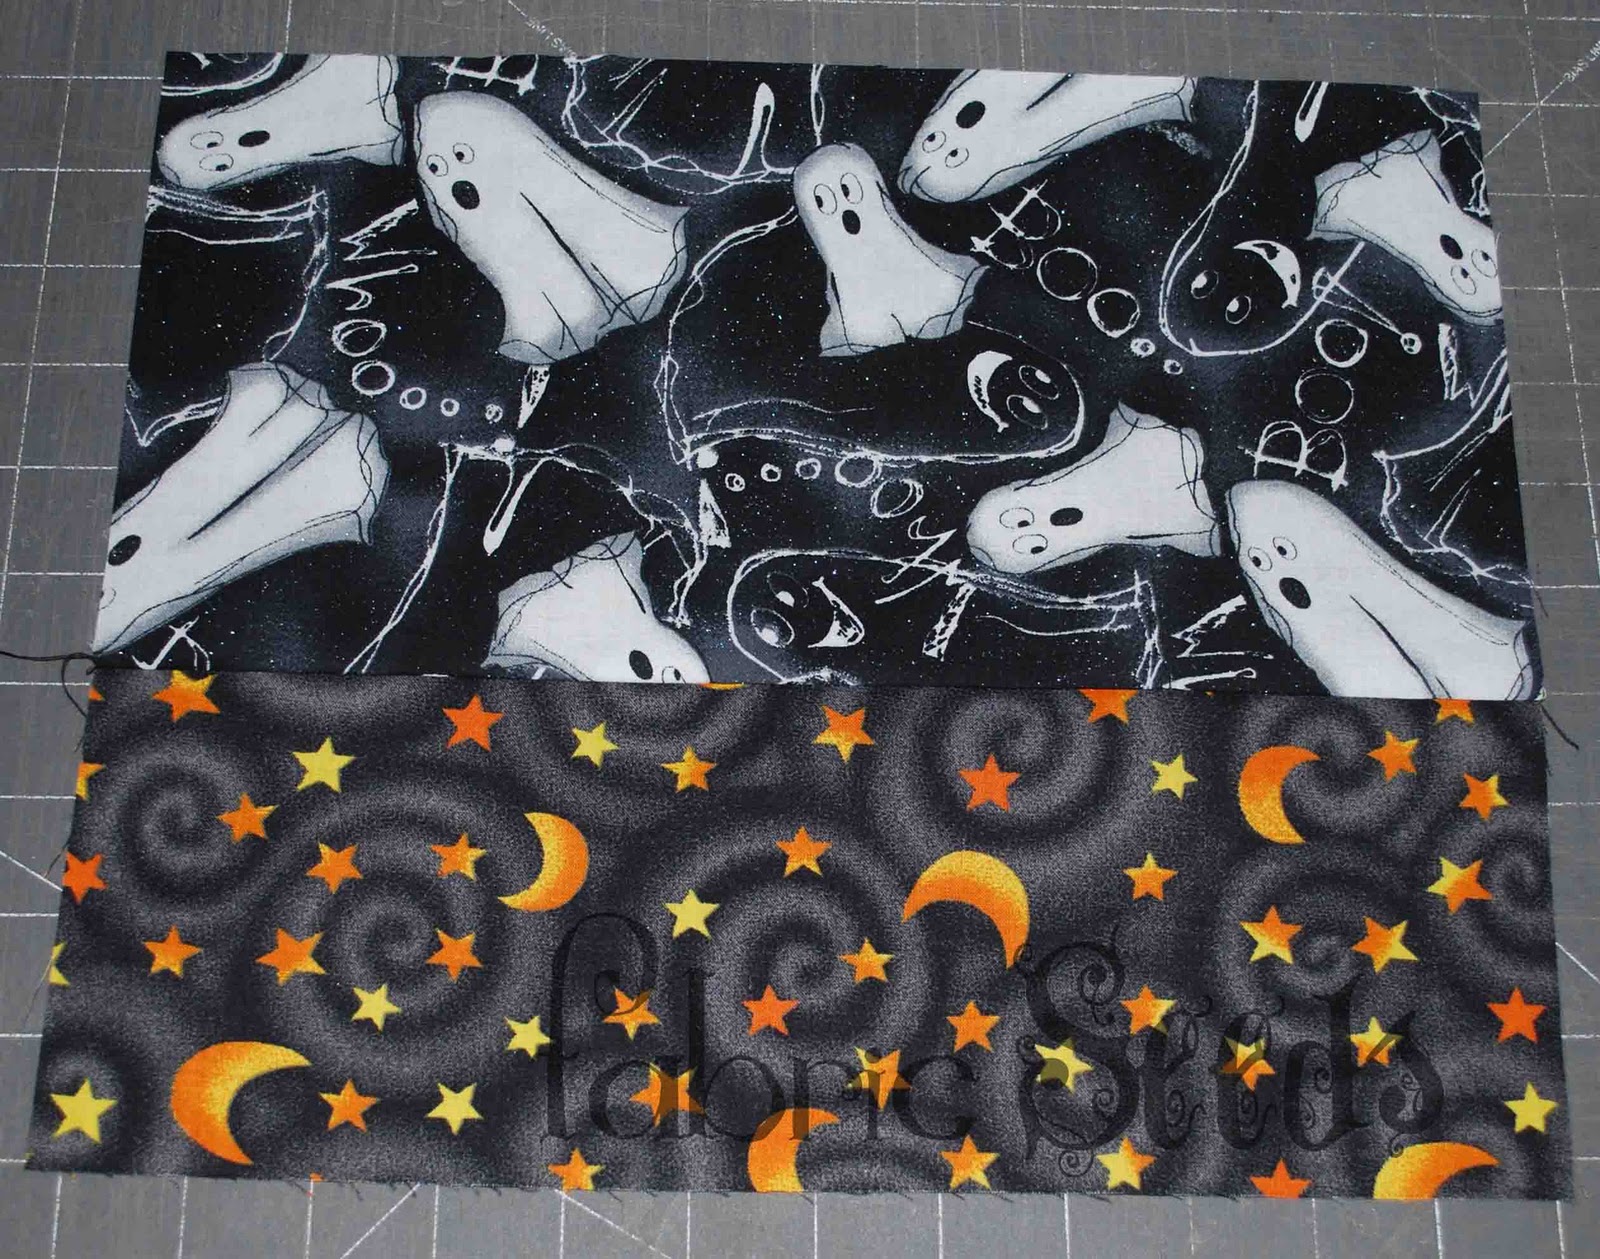
From the top fabric, cut 2 pieces measuring 6 1/2 x 12 1/2
From the bottom fabric, cut 2 pieces measuring 4 1/2 x 12 1/2
For the liner, cut 2 pieces measuring 10 1/2 x 12 1/2
For the handles, cut 2 pieces measuring 2 1/2 x 12 1/2
20 inches of 1/2 inch thick rope (I went to Lowe's. You can buy it by the foot.)


Assembly:

Using a 1/4" seam, attach the top and bottom pieces, right sides together.

Press seam toward top fabric for one block, and press seam toward bottom fabric for second block.

Fold the fabric for handles in half so right sides are together.


Sew and turn right side out. Do not press.


Cut 2 pieces of rope each measuring 10" long.
Insert rope into turned handles.


You should have about an inch of remaining handle on each of the rope ends.


Pin one side of the handle to the top of the bag, right side facing, 2 1/2 inches from the end. Extend handle end 1/4 inch from the bag edge.

Sew into place.
Pin the opposite side of handle in the same manner. (push the rope as close as you can to the first seam. this will help with sewing the other side of the handle.) Repeat for the second block.

With right sides facing, attach the liner to the top of the bag.
Press.

Open.

With right sides facing, align both pieces so liner faces liner and bag top faces bag top.
Start about 1/3 from the bottom corner of the liner and sew along all edges, stopping about 1/3 from the opposite corner of the liner. You should have about 3-4 inches open in the middle of the liner.


Fold each corner of the bag so it makes a triangle.
Mark a line 2 inches deep and 4 inches wide creating a triangle end.

Pin and stitch.


Cut 1/4 inch from the seam line.


This next part can get a little tricky.
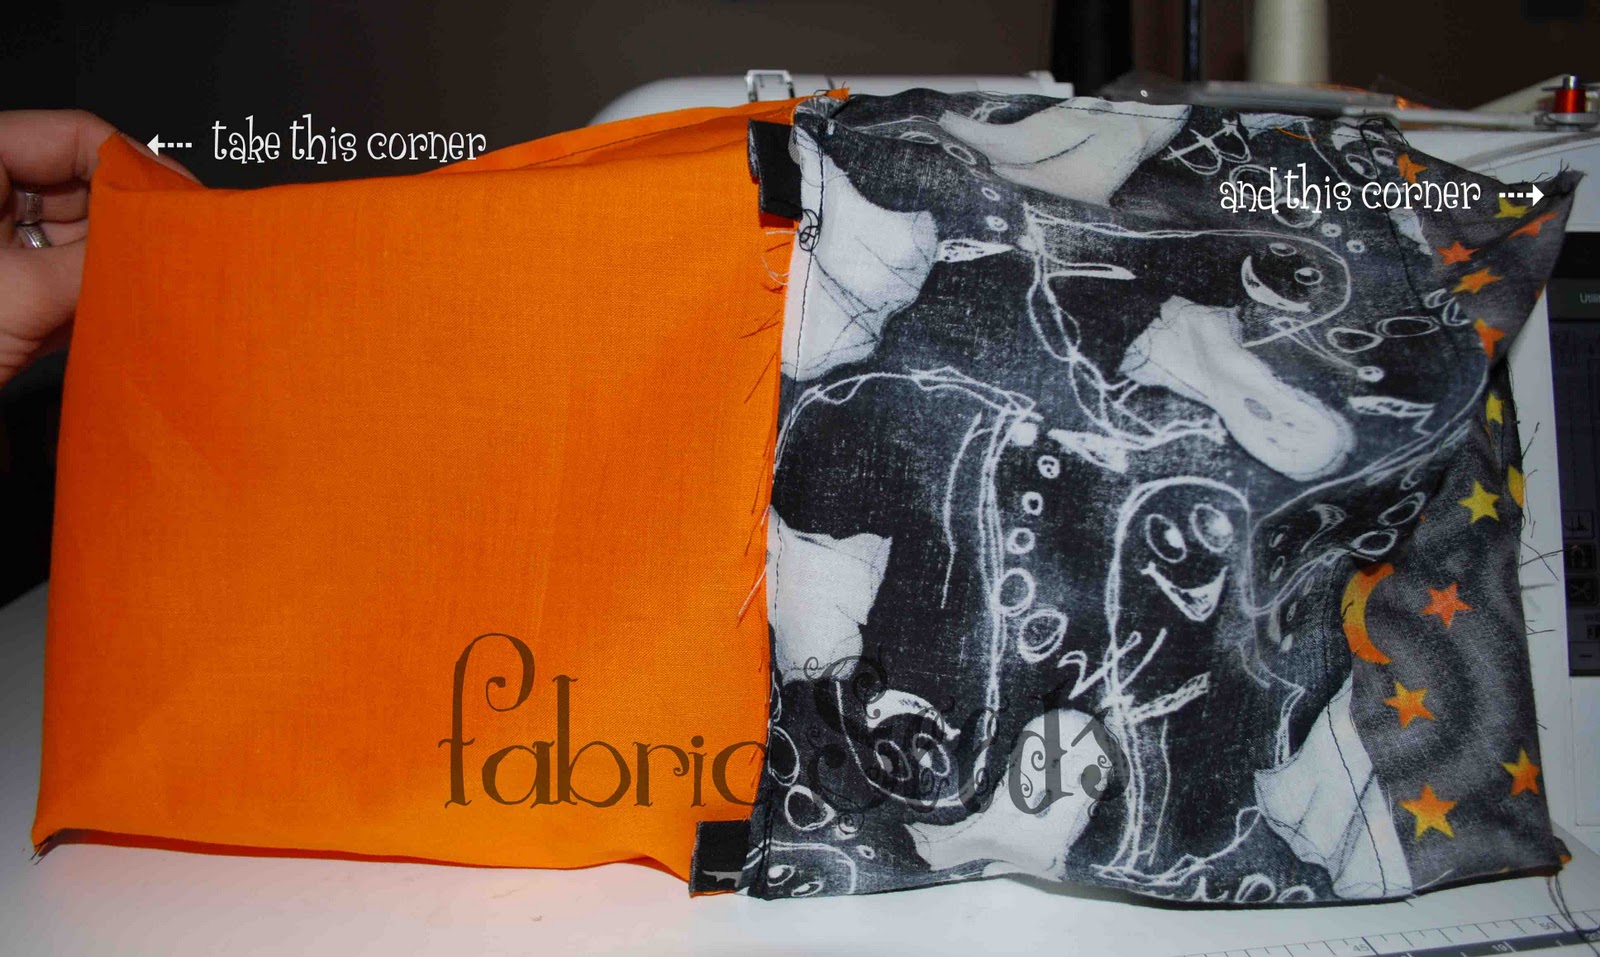
Take the closest corner of the liner in your left hand and the closest corner of the bottom fabric in your right hand.


Match right sides together; pin.


The bag should be turned inwards. do the same for the opposite side.


 The bottom seams and opening should be facing each other when you are through.


Stitch at pins.

Turn bag so you can see the opening at the bottom of the liner. pull bag thru, starting with the handles.
Whipstitch opening of liner together.


Invert bag so liner is in the inside of the bag.

And ... You are done!

I hope this was easy to follow. If you have any questions, please feel free to email me!
I started a Flickr group, so that y'all can share if you make anything from my blog (I have a few more tutorials in the works). I sure would love to see how yours turn out!
(I think I am really bad at flickr. if anyone has any tips, I'd really appreciate it.)

September 16, 2011

Tricks for Treats

I started my Halloween sewing last week.
I bought some of Riley Blake's 'Boo For You' collection last year and made some pillowcases for the kids.

Argyle liked his so much, it has been on the bed all year. After making the pillowcases, I had to buy more fabric to make matching trick-or-treat bags. I was a little late last year and never got them made. In fact, when I pulled all the fabric out, I forgot excatly what I was going to do in the first place. Good thing I remember about Monica's little tote tutorial. With a few adjustments, it was perfect!

Trick-or-treat bags were the first thing on my Halloween sewing list. I fussy cut the scenes so the kids would have matching bags. I did want to make Paisley's just a little bit girly though. I didn't have any girlish Halloween fabric in my stash, so I went to one of my local shops. I couldn't find what I had wanted, but I think I found something better. These cute litte ghosts from Andover's Matilda line. With the little bits of pink and purple I thought it was perfect for a little ghoul.


Since I had already cut out the fabric for two bags, I decided I shouldn't let the third bag to waste.

So ....

I am giving it away to one of you!


Maybe your little one needs a trick-or-treat bag too, or maybe you know someone who would like this adorable bag, or maybe you just want it because it is free! It doesn't matter why you want it, you just do!
And, if you are one that does want this bag, just leave a comment about trick-or-treating.
You get an extra entry if you are signed up for my newsletter.
(you can find the sign up on the upper left side of the blog or on the website)
Comments will be open until Tuesday, September 21 - midnight MDT
Winner will be drawn by Random.org.

Ghoul Luck!
(this giveaway is now closed and winner has been chosen!)