
subscribe via rss e-mail me facebook pinterest home Image Map
Showing posts with label crafts. Show all posts

September 11, 2014

Craft Book Month Blog Hop {Little Stitches}

Craft Book Month

September marks the 4th Annual Craft Book Month at Craft Buds! This year, we're excited to celebrate all month long with a blog hop of inspiring craft book projects and LOTS of giveaways for sewing along with a sewing, knitting, cookbook or other craft book of YOUR CHOICE.

If you are a craft book hoarder, you are not alone! I collect more and more books each year. 
It's time to dust off your craft books, unfold those crisp pattern sheets and put those patterns to good use by actually making some projects. :)


My PrOJeCT

I am so excited to be invited back to this fun blog hop! I love seeing every one's projects and being introduced to new books. This is my 3rd year participating. The last 2 years, I have stuck to what I'm good at - making quilts (You can see my past projects for Craft Book Month here and here). This year, I stepped away from the machine and took to needlework.


I have been admiring the many new (and super adorable) embroidery patterns that have popped up over the last few years. When I was a child learning to sew, I had a cross-stitched teddy bear pillow to work on. Although I don't think I ever finished it. Hmm...


I dabble here and there with needlework, but don't know many stitches. Little Stitches by Aneela Hoey is a fantastic book for any beginner. There is so much information about what type of needle to use, how to prepare your fabric and hoop, and starting/finishing stitches. She also describes each type of stitch, what it's used for and has step-by-step instructions with illustrations on how to create each stitch.


Little Stitches includes 12 projects from start to finish, including sewing zippers, quilting and binding. There are also over 100 ready to use drawings to help you get started with your design. The drawings come on regular pages as well as transfer pages, so you can easily iron on to your fabric. 


I had a hard time narrowing down which drawing to use. I was first drawn to the Cherry On The Tree Swing. I also liked Little Red Riding Hood, the clothesline, the bunting, the tree house and the girl with the umbrella. 


But before I could really decide on a drawing, I first had to decide what I would be using it on. I dug through some of my craft drawers and found a basket liner cloth. Now that I knew what I would be working on, I still couldn't decide on a design. Ultimately, I took the tree from Cherry On The Tree Swing, the bunting and the fruit basket to create my own little scene. 


Because each drawing was a different scale, I had to do a little resizing on the copier. 
I traced the drawings onto my cloth as best I could. It was a bit difficult to trace due to the weave, so it was a pretty rough trace. I wasn't able to trace the leaves at all. The bunting rope and grass was also hard to see and were drawn in later, along with the side post for the bunting. 


I placed the leaves at random. I used different shades of green, yellow and orange, and add a few falling leaves to complete the look.


I LOVE the way it turned out! I think I might make a few more of these :)


Be sure to link up your own projects for a chance to win a copy of Little Stitches, along with some other pretty great prizes! (Details for entering are below) 

What will you be making from your craft books this month?

Looking for a new book? 
You can find a variety of craft and sewing books in my store.


2014 CRAFT BOOK MONTH BLOG HOP!

I've teamed up with some fabulous bloggers who will be showing off their projects made from craft books, all month long! 

Monday 9/1: Fabric Mutt / Lindsay Sews 
Tuesday 9/2: Rae Gun Ramblings / Craftside 

Wednesday 9/3: The Feisty Redhead / The Fabric Studio 


Friday 9/5: LRstitched / A Prairie Sunrise 

Monday 9/8: Hopeful Threads / sewVery
Tuesday 9/9: 13 Spools / Lisa Liza Lou
Wednesday 9/10: Stitch This! / My Sewcial Hour
Thursday 9/11: The Littlest Thistle / Fabric Seeds
Friday 9/12: Sew Sweetness / Clover + Violet
Monday 9/15: Inspire Me Grey / amylouwho

LINK UP

9/1-9/30: Link up your craft book project at Craft Buds from your blog or Flickr account, and enter to win prizes. To participate in the month-long contest, just link up any project you've made from a pattern in a craft book. That easy! You'll tell us a little about the book, the project, how you personalized it, etc. Winners will be announced on Wednesday, October, 1!

RULES

1) One entry per person. 
2) Your craft book project must have been completed in 2014.  
3) Create a new blog post, instagram, or Flickr photo (dated September 1, 2014 or later) and link or refer back to Craft Book Month at Craft Buds (#craftbookmonth for instagram) in your post or photo description. Make sure to list the craft book you used and provide a link if possible.  
4) All winners chosen via Random.org. Some prizes available to international winners, so please join us!


PRIZES

Visit Craft Buds and link up your craft book project during the window of Sept 1-30 and you'll automatically be entered to win some fantastic prizes from the Craft Book Month sponsors!

Craft Book Month at Craft Buds

August 27, 2014

Craft Book Month Blog Hop Is Coming!!


Craft Book Month

September marks the 4th Annual Craft Book Month at Craft Buds! This year, we're excited to celebrate all month long with a blog hop of inspiring craft book projects and LOTS of giveaways for sewing along with a sewing, knitting, cookbook or other craft book of YOUR CHOICE.

If you are a craft book hoarder, you are not alone! I collect more and more books each year. It's time to dust off your craft books, unfold those crisp pattern sheets and put those patterns to good use by actually making some projects. :)

2014 Craft Book Month Blog Hop!

I've teamed up with some fabulous bloggers who will be showing off their projects made from craft books, all month long!

Monday 9/1: Fabric Mutt / Lindsay Sews

Tuesday 9/2: Rae Gun Ramblings / Craftside

Wednesday 9/3: The Feisty Redhead / The Fabric Studio

Thursday 9/4: Marci Girl Designs / Small Town Stitcher

Friday 9/5: LRstitched / A Prairie Sunrise

Monday 9/8: Hopeful Threads / sewVery

Tuesday 9/9: 13 Spools / Lisa Liza Lou

Wednesday 9/10: Stitch This! / My Sewcial Hour

Thursday 9/11: The Littlest Thistle / Fabric Seeds

Friday 9/12: Sew Sweetness / Clover + Violet

Monday 9/15: Inspire Me Grey

Link Up

9/1-9/30: Link up your craft book project at Craft Buds from your blog or Flickr account, and enter to win prizes. To participate in the month-long contest, just link up any project you've made from a pattern in a craft book. That easy! You'll tell us a little about the book, the project, how you personalized it, etc. Winners will be announced on Wednesday, October, 1!

Rules

1) One entry per person.

2) Your craft book project must have been completed in 2014.

3) Create a new blog post or Flickr photo (dated September 1, 2014 or later) and link back to Craft Buds/Craft Book Month in your post or photo description. In your post or photo description, make sure to list the craft book you used and provide a link if possible.

4) All winners chosen via Random.org. Some prizes available to international winners, so please join us!
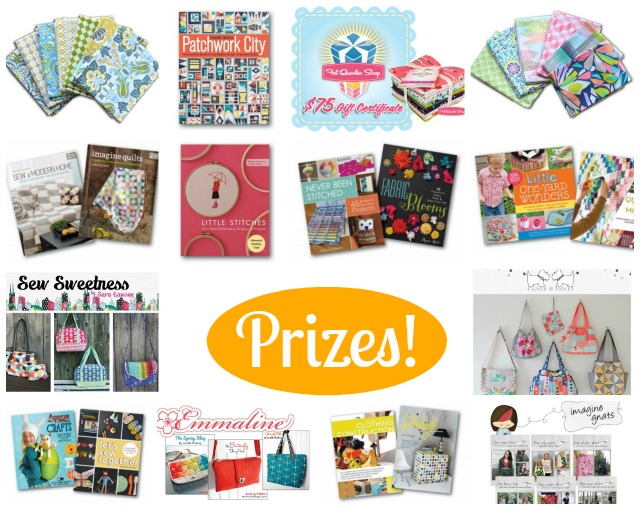
Prizes

Visit Craft Buds and link up your craft book project during the window of Sept 1-30 and you'll automatically be entered to win some fantastic prizes from the Craft Book Month sponsors! More info coming soon . . .
Craft Book Month at Craft Buds

August 7, 2014

Fairy Forest

A couple months ago, a friend of mine told me about a Fairy Forest she heard about. After doing a bit of research, I was able to find Its location, and we all went out there last month. This place was so amazing! It's located in an area of woods that was so open, with trails winding in and out of the trees. Nestled below the trees, in the trees and  in the small clearings were fairy houses, dwellings, villages and trinkets for all the fairies.

First thing we saw was the Enchanted Forest, where Tinkerbell and her friends live. 


This little ranch was my absolute favorite! I love the little pigs and cows. It even had a little chicken coop!


Fairy Stonehenge.


We spent a couple hours in the forest. There was so much to see, I don't think we got to it all. Every couple of seconds one of the kids would call out "Woah, look at this!" "Look what I found!" "Hey guys, I found something over here!". 


My kids wanted to make some houses for the fairies too. So I got a couple of small bird houses and some glitter paint. I found a cute little set of picket fence and picked out a few fake flowers. The kids also brought home a few pine cones to paint.

 A couple days later, we headed back to the forest to give the fairies their new houses. A few minutes after we got there, we got caught in a hail storm that lasted at least half an hour! We were pretty soaked by the time we found a good spot for our houses.
 

We also sprinkled some glitter around their new houses and marked a pathway for visitors. 


Hope y'all have a magical day! :)


June 28, 2014

Hand Print T-shirts {A Tutorial}

One of my favorite holidays is Independence Day. I LOVE IT! I go all out each year, and start planning weeks (sometimes months) ahead of time. I usually get the kids a new patriotic outfit each year. But this year,  I thought it would be fun to make 4th of July T-shirts with my kids.
While I was visiting my brother last week, we gathered all the kids to make shirts. This was a great activity for them. They all got pretty creative with their own shirts. 
It was the perfect activity to fill up an afternoon.


Here's what you'll need:

T-shirt
Red paint
Blue paint
Fabric Medium
Sponge brushes
Potato
Masking tape
Cardboard to fit inside the shirt

First thing, make a potato stamp. If you've never made a potato stamp, they are super easy!

Simply cut the potato in half.
Draw your shape on the cut side of the potato.


Cut around your shape.


Ta-da! Potato stamp!


Prepping the paint:


Did you know that you make any paint in to a fabric paint? All you have to do is add fabric medium. It helps  the paint to set softer, more flexible against the fibers. It also won't crack as much (if at all)  in the wash. 

Simply mix 2 parts paint to 1 part medium, until well blended. 


Next, place the cardboard inside of the shirt. The cardboard should cover all areas that you want to paint. I then did a dry run with placement of the kid's hand, then made stripes with the masking tape with their hand still in place. 


Painted each little hand


And press firmly into the open space on the shirt.
Make sure to press the middle of the hand and the fingers well.


Gently lift hand from the shirt.


For my shirt, I wanted to use each of my kids' hands; and I wanted them to make a heart. My boy was in a little bit of a hurry, so the middle of his palm didn't quite get pressed down as much as it should have.


 Next, we used the potato stamps to add stars,


And, painted between the tape stripes with a sponge brush.
 I also did a thinner line of paint along the top and bottom of the first and last stripes.


Here's my nieces' and nephews' shirts:


 And, here are mine and my kids' shirts:


Hope ya'll have a great holiday!